Matt's Old Cars.com
Fiddling with Rambler's since 1995
Project Charity: AMX
Technical Information
Photo Gallery
Rambler American Restoration
1978 El Camino
1967 Rambler American
2007 Dodge Ram
1984 Dodge Ramcharger
Links
FAQ
Send me an e-mail:
Contact Form
Back to American Restoration Index
Fixing the Leaky Windshield in my `68 American
Part 5 - Cutting Out The Rusty Cowl Sections
February 9, 2002
Since we had an unseasonably warm day today, I decided to get started on the cowl repairs. There were two areas on the cowl that needed repairs. The first was on the passenger side of the cowl where the baffle for the heater box meets the cowl. The second was around the hole for the passenger side wiper arm where the cowl had cracked.
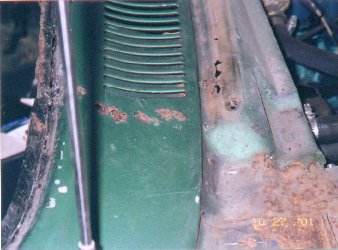
I got started by cleaning up the left over sealer from the windshield gasket. Lacquer thinner, a few paper towels (I used the Scott brand shop towels), and a little elbow grease was all it took to clean it up.
The next step was to determine where to cut the car and to lay out the cuts with masking tape. There's no scientific way of doing this but you need to keep a few things in mind before you start cutting. The first is to make sure your cutting tool can get to all of the places you've laid out. The second is to make sure you'll be able to cut the replacement part along the same lines without damaging it. The third is to make sure you can get your welding gear into all of the areas you're cutting. The fourth (and final) consideration is to make sure you'll be able to get your grinder into all of the areas where you'll be welding
With all of this in mind, I spent about an hour (mostly on the part near the cowl baffle) laying out my cut lines.
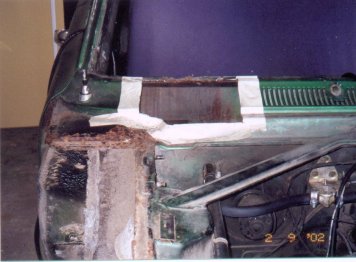
One of the great things about using masking tape is it allowed me to lay out the cuts and if I didn't like where they were, all I had to do was move the tape around. Also keep in mind that any rust is always worse than what you see and you should always cut out more than you think is rusted. I went about an inch on either side of the rust. If you need further proof, take a look at the front and back of the rusty section I cut out of the cowl.
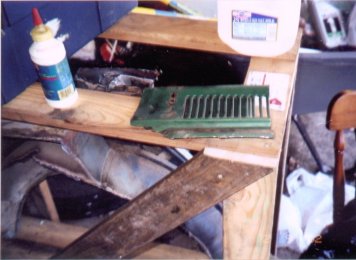
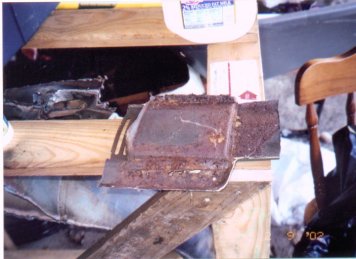
I then started cutting. I used a 3 inch air powered cut-off tool. This tool does a really good job cutting the metal cleanly but is a bit much for my 5 HP compressor so I had to stop often to let the compressor catch up.
When you go to cut metal off of your car, be careful what you use to do the cutting. You should never use an oxy-acetylene torch to cut out the sheet metal. You will end up with a very nasty cut line that you'll have to trim up by hand anyway. Good choices are sheet metal nibblers (they use a punch to cut the metal), a cut-off tool, tin snips, a reciprocating saw (a jig saw or something like a Sawz-All), or a plasma cutter. Whichever method you choose, keep in mind that you'll need to do some metal work around the areas you cut to get a nice fit when you weld it all back together.
Once you have the old parts cut out, make sure to save them to use as guides for the replacement parts.
After all of the cutting was done, I did another close inspection of the areas I just cut to make sure that I had removed all of the rusted or cracked areas before I start cutting replacements out of the cowl I bought for this repair (see the previous article for information on where I bought the replacement panel).
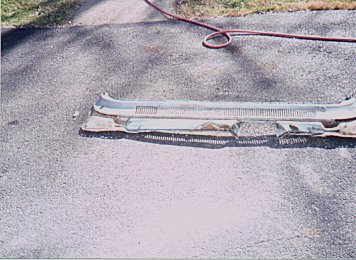
It looks like my first attempt removed all of the problem areas. After I cleaned all of the junk out of the cowl, I don't see any other problem areas. However, I did find another mouse nest.
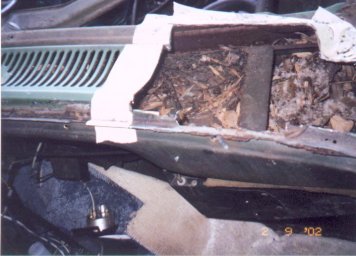
This one was on top of the heater core and is probably why I hadn't been getting good airflow out of the heater and defroster lately.
Up Next: Welding in the replacement panels.
Last Updated 01/04/04 09:21:30 PM