Matt's Old Cars.com
Fiddling with Rambler's since 1995
Project Charity: AMX
Technical Information
Photo Gallery
Rambler American Restoration
1978 El Camino
1967 Rambler American
2007 Dodge Ram
1984 Dodge Ramcharger
Links
FAQ
Send me an e-mail:
Contact Form
Back to American Restoration Index
1967 Wagon Quarter Panel Repair
Part 1 - Figuring Out What To Replace
November 13, 2005
Since I had the gas tank out for cleaning, I decided to fix the rust in the passenger side quarter panel on my wagon. The picture below shows what the area I'm working on looked like before I started messing with it.
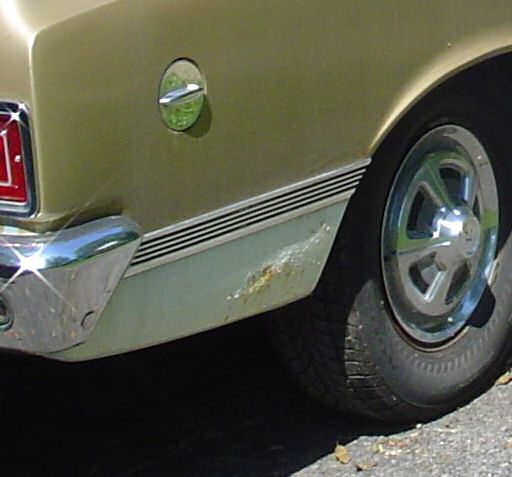
As you can tell, there is a big spot just behind the wheel and below the molding. On 220 trim level cars, there is a visible body line just above the molding. It's there on 440's as well but the molding hides it. There's also a spot above the trim just behind the wheel opening.
Removing the molding was a bit of a pain since I had to figure it out but here's how to do it without damaging it:
- On wagons, un-snap and remove the rear carpet, remove the rear seat lower cushion, the seat back catch, and the interior trim panel. Be very careful with the interior trim panel. These panels become fragile with age and are very difficult to find if you break yours.
- With a pair of pliers, gently squeeze the end of each clip and push it forward (this may take a little force if the sealant hasn't failed). There are three clips.
- Before you remove the last clip, either get a helper to catch the trim or put a towel down so the trim isn't scratched when it comes off and hits the ground.
Once the trim was out of the way, I started poking at the rust bubbles until I ended up with what you see below.
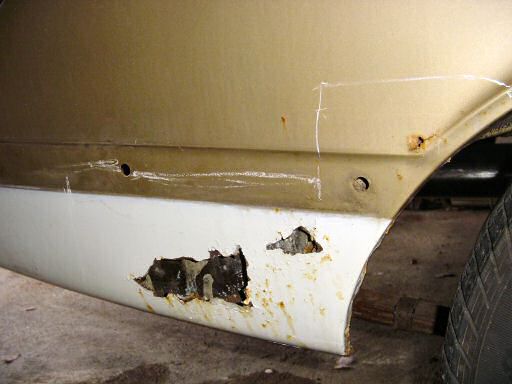
The extension panel looks to be in good shape and there are no soft spots that I can feel. There may be some damage to it but I'm not going to know that until I cut the rusty metal out of the way.
I then spent a good bit of time getting all of the loose rust and sound deadener out of the way so I could see how bad things are on the back side.

Things look a lot worse in the picture than the really are. It looks like what happened is that the sealant around two of the trim clips failed which let water get in under the sound deadener. Since that water didn't have any place to go, it sat and caused the panel to rust. I also found that there was a big glob of the sound deadener in the pinch weld for the rear wheel opening that allowed water to pool up and the panel to rust just above the trim.
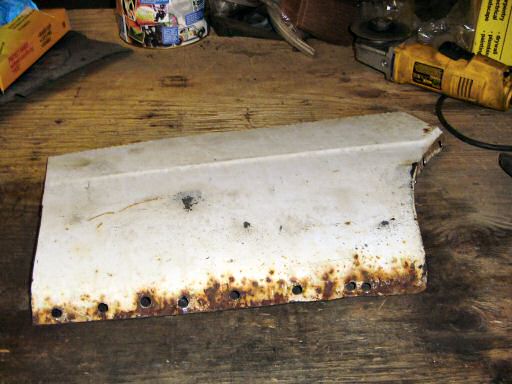
Here's the patch panel I'll be using for most of the repair. Unfortunately, it has a rust hole above the body line in the same spot as the wagon. I have an entire back end that I picked up for my sedan that will provide the patch to fix this area. You've no doubt noticed that the bottom of the patch is pretty rough looking. This is actually just surface rust. Paint jobs were done quickly and typically, hard to reach places didn't get much paint. The bottoms of the quarters on the wagon look like this as well.
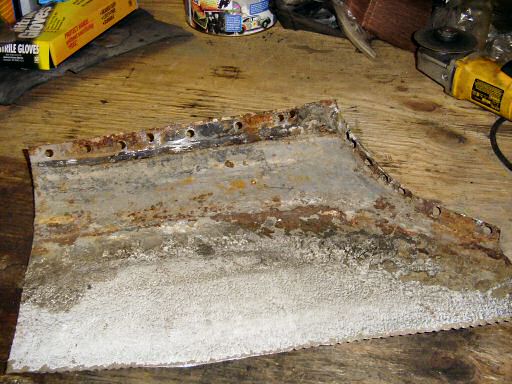
Here's the inside of the patch panel. It's mostly nice, clean metal. The surface rust on the flanges is from gaps in the pinch welds along the bottom and wheel opening. The body work in these areas is pretty crude from the factory but I'll spent the time getting them nice when things go back together.
Up next: Removing the rusty parts.
Last Updated 11/20/05 02:34:10 PM