Matt's Old Cars.com
Fiddling with Rambler's since 1995
Project Charity: AMX
Technical Information
Photo Gallery
Rambler American Restoration
1978 El Camino
1967 Rambler American
2007 Dodge Ram
1984 Dodge Ramcharger
Links
FAQ
Send me an e-mail:
Contact Form
Back to American Restoration Index
1967 Wagon Quarter Panel Repair
Part 3 - Putting It Back Together Part 1
February 25, 2006
Within a few days of the last update, it turned very cold (I did manage to cut and prep the extra pieces I needed before it turned cold) and then right before it warmed back up enough to work, I partially tore a tendon in my left knee so with the exception of one work session between then and now, I haven't really done anything to the car. I did make good progress today so without further ado...
The first thing I did during the previous work session was prep the replacement for the section of wheel well I cut out.
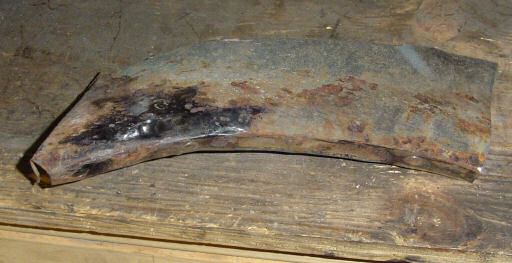
I do want to point out that this section is missing roughly 1/2 of an inch from the lower left hand side (it should come to a point). I wish I would have noticed this at the time since this missing piece ended up causing me a bunch of trouble (more on that later). This piece did have a few pin holes in it that I welded shut.
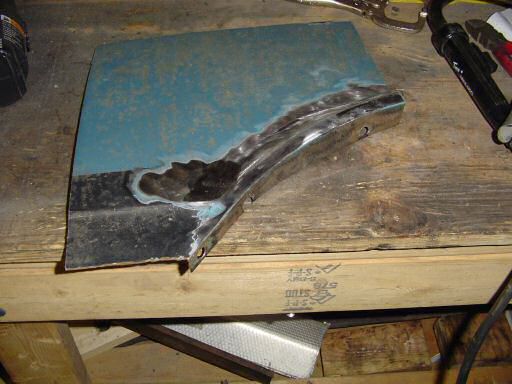
Once the wheel well piece was ready, I turned my attention to the patch panel for the quarter panel itself. This piece also had a few pin holes in it that I welded shut and ground smooth.
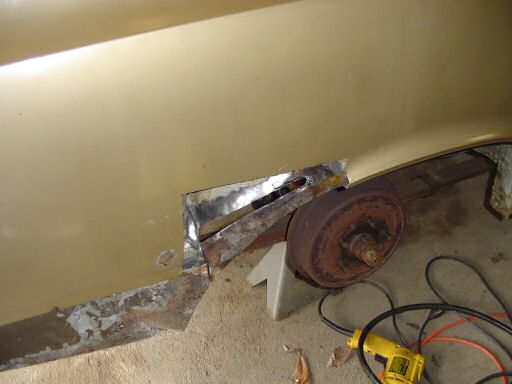
This is where I left things prior to it turning cold and my knee injury. The last time I worked on the car (I have no pictures of this session since my knee was hurting enough that I didn't want to do any extra moving around to take pictures), I began fitting the wheel well lip patch. This is where that missing piece got me. Admittedly, I shouldn't have been working on the car at this point since my knee was still sore enough that I had a hard time concentrating on the car. To make a long story short, the missing part of the patch through all of my measurements off, I cut the patch wrong, and I ended up with a couple of 1/2 inch gaps after I realized my mistake. Once I saw what I did wrong, I spent the next two hours adding that half inch piece to the patch. The reason it took so long is that I had to get that piece from the part I cut off the car (it was in better shape than the one from the donor quarter I purchased to start with). It ended up having lots of pin holes and heavy pits in it. I think it ended up being about half new metal from my MIG welder by the time I was done. If this wasn't bad enough, my garage chair also broke while I was working (it was submerged for a few hours in a flood at my parents house about 5 years ago and one of the edge glued boards that make up the seat came unglued). At this point, I was really hurting so I put down the tools and left it alone until today (a month and a half later).
Today ended up being the day I got back in the garage. It was pretty warm, it wasn't raining, and my knee's been feeling pretty good. I started by lining up the wheel well lip patch and tacking it in place. I then added a half inch filler to the right of the patch, ground the welds smooth, squared up the gap, and ended up with what you see below.
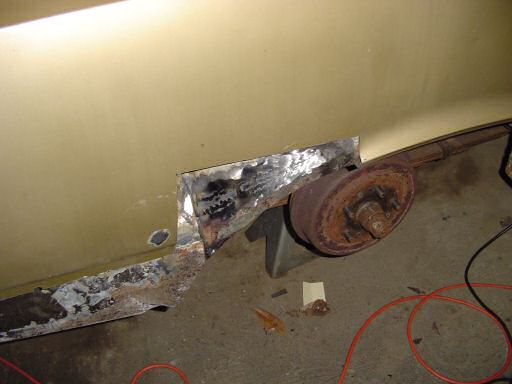
Once that was done, I cut two more filler strips to take care of the gap at the top of the original patch. The reason for doing this in two pieces is that the wheel well is one giant compound curve and there's also an almost 90 degree bend where it meets the trunk floor pan. Cutting this in two pieces made the patch job easier.
I still have some more welding and grinding to do in this area but after I pinched my toushy in the broken chair, I decided to stop and fix the chair. On the plus side, I did get to use my plate joiner which I hadn't used in several years. Don't worry, there will be no pictures of the chair or my toushy!
Up next: Patching the quarter panel
Last Updated 04/18/09 05:18:54 PM