Matt's Old Cars.com
Fiddling with Rambler's since 1995
Project Charity: AMX
Technical Information
Photo Gallery
Rambler American Restoration
1978 El Camino
1967 Rambler American
2007 Dodge Ram
1984 Dodge Ramcharger
Links
FAQ
Send me an e-mail:
Contact Form
Back to American Restoration Index
Holley Model 1931 Rebuild
Carburetor Disassembly (cont.)
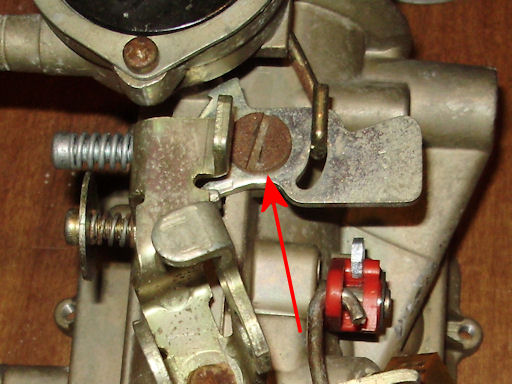
Using the 3/8" flat head screw driver, remove the screw holding the fast idle cam (red arrow) to the carburetor body and remove the fast idle cam.
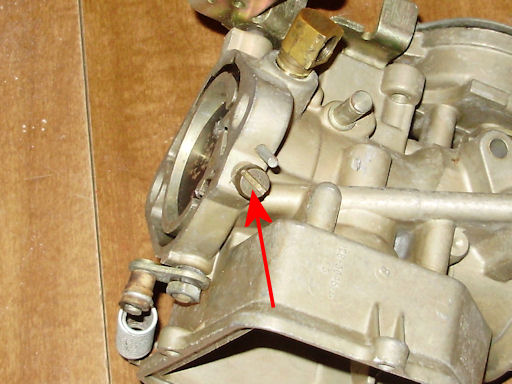
Remove the fuel mixture screw (red arrow) and spring.
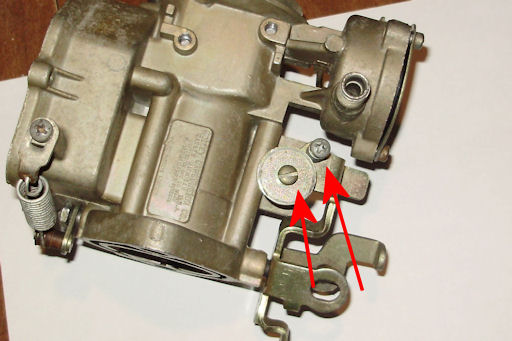
Using a #2 Philips screw driver, remove the screws (red arrows) holding the bowl vent rod to the carburetor. Remove the rubber valve from the end of the rod and place in the discard pile.
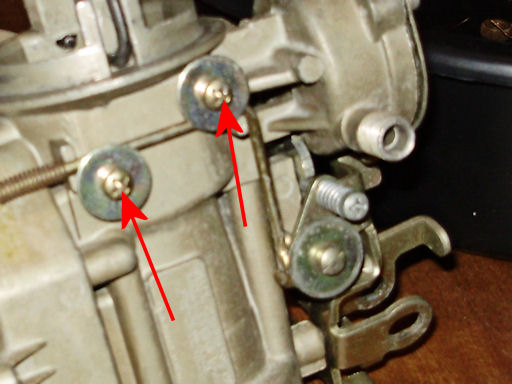
Remove the curb and fast idle adjusting screws (red arrows) and springs. The flat head screw is for curb idle and the #2 Philips head screw is for the fast idle.
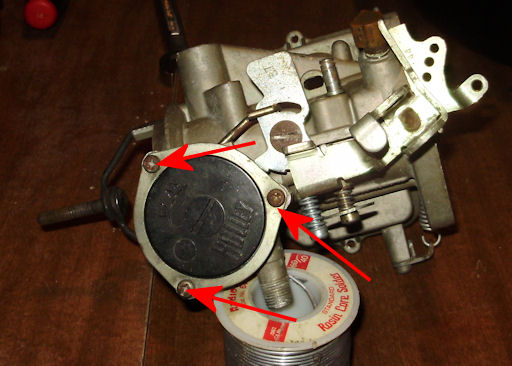
Using a #2 Philips screw driver, remove the 3 screws (red arrows) from the choke thermostat cover. Remove the choke thermostat and gasket.
Note: The retainer is not a flat piece of metal so no
effort should be made to make it flat. The area the screws go into is lower
than the rest of the retainer and it must be reinstalled the same way.
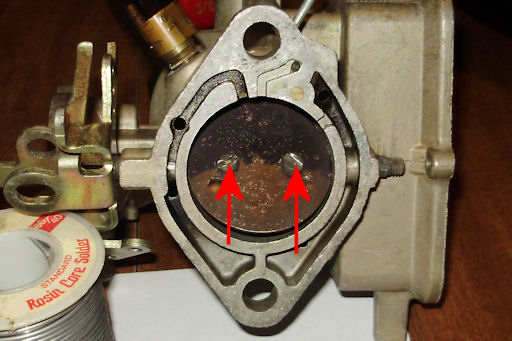
Note: If the inside of the choke housing is sooty, that means that
the section of tubing in the exhaust manifold that the choke tube fits into
has a hole and needs to be replaced.
Kennedy American carries this
part as part number 3223024. A common symptom of this is a car that runs at
fast idle after driving on the highway,
According to the TSM, you do not need to do any further disassembly as part of a normal rebuild. However, the TSM was written when these cars were new and there is likely to be more wear than what the factory expected. Also, there is a good chance that the throttle shaft has (or needs) bushings in it and those may be made out of a material that will not survive cleaning. Worn throttle shafts can cause surging and will make it very difficult to properly set the fuel mixture and idle speeds.
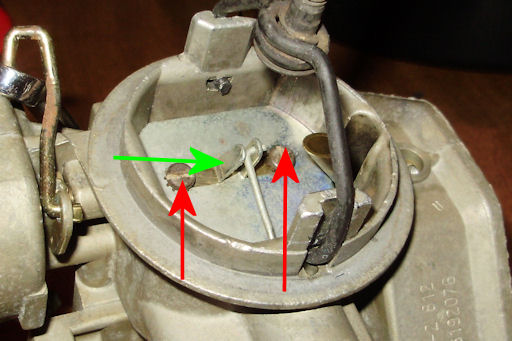
The choke shaft is generally not worn but removing it allows better access to the carburetor throat which makes cleaning easier. To remove it, gently bend the tab (green arrow) out of the way so you can remove the link. Then, using the 3/16" flat head screw driver, remove the 2 flat head screws (red arrows) from the plate and remove the plate. There is a small (#1 Philips) screw holding the choke rod lever to the choke shaft (in this picture, the screw is covered by the choke rod). Remove the screw and slide the choke shaft out of the carburetor body. Remove the choke rod from the lever.
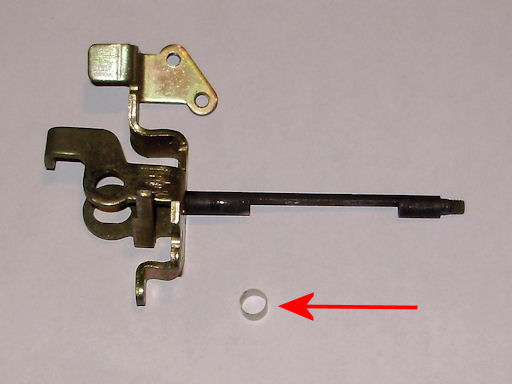
Remove the throttle return spring (green arrow), the e-clip on the end of the plastic bushing, and the plastic bushing. Remove the nut on the end of the throttle shaft with a 3/8" combination wrench. Remove the lock washer and return spring lever. Remove the spring anchor from the carburetor body with a #2 Philips screwdriver.
Remove the two throttle plate screws with a 3/16" screw driver, remove the throttle plate, and remove the throttle shaft.
Here is an example of why you should remove the throttle shaft. On this carburetor, a plastic bushing (red arrow) was fitted to it to fix a sloppy throttle shaft.
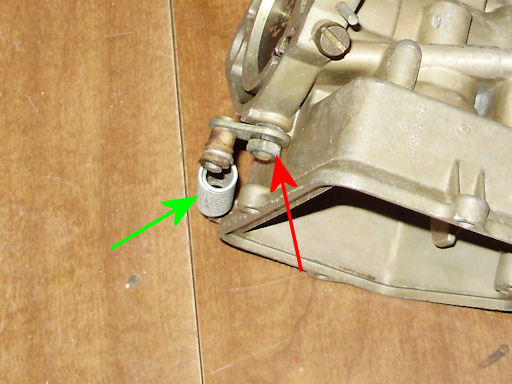
It is also a good idea to remove the brass elbow for the vacuum advance line. There is a good chance that you'll damage it during removal unless you have an extra flare nut of the correct size to put in it during removal. If you damage it, it can be replaced with Edelmann #122320.
Last Updated 03/07/10 03:22:02 PM