Matt's Old Cars.com
Fiddling with Rambler's since 1995
Project Charity: AMX
Technical Information
Photo Gallery
Rambler American Restoration
1978 El Camino
1967 Rambler American
2007 Dodge Ram
1984 Dodge Ramcharger
Links
FAQ
Send me an e-mail:
Contact Form
Back to American Restoration Index
Holley Model 1931 Rebuild
Carburetor Disassembly
Here are the tools you'll need to disassemble your carburetor:
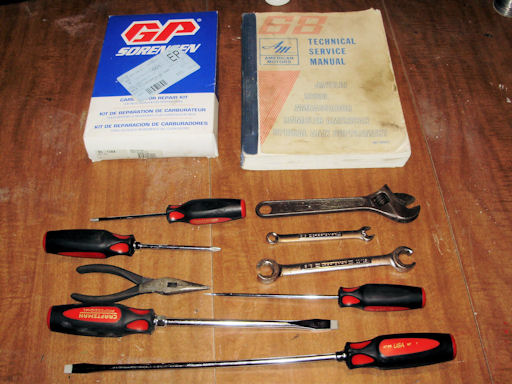
- Carburetor rebuild kit
- Second carburetor mounting gasket (Fel-Pro 60044)
- Technical Service Manual (TSM) for your car
- 3/8" combination wrench
- 5/8" flare nut wrench
- Adjustable wrench
- #1 Philips screw driver
- #2 Philips screw driver
- 3/16" flat head screw driver
- 5/16" flat head screw driver or a Holley jet removal tool
- 3/8" flat head screw driver
- Needle nose pliers
- Razor blades or gasket scraper (not shown)
- Container to hold all of the parts.
Disassembly
Note: These picture show the carburetor with the air cleaner stud attached. It is much easier to remove that using a large, flat bladed screw driver before proceeding any further. Yes, it will be difficult to remove but removing it now makes it easier to work on certain areas and with it remove, the main body will fit into a gallon container of carburetor cleaner.
Start by removing the needle valve using the 5/8" box wrench. There is a metal gasket that may be stuck to the fuel bowl. Make sure to remove that as well and set them in your discard pile.
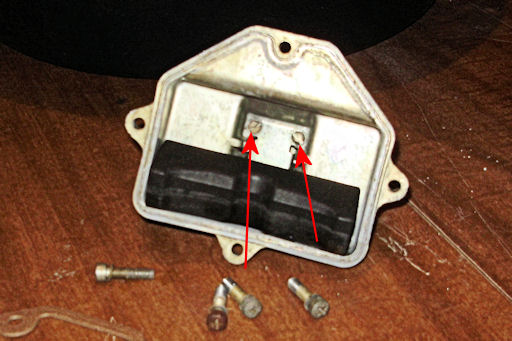
Next, use a #2 Philips screw driver to remove the 4 fuel bowl screws (red arrows point to the screws).

Note: If it has been a long time since the last rebuild, these screws can be very difficult to remove. Make sure your screw driver is in good shape before starting and take your time. If needed, you can spray some penetrating oil on them from the main body side.
Once the screws are out, remove the fuel bowl cover. It will probably be hard to remove but resist the temptation to pry between the main body and screw bosses in the cover. Doing so will likely warp the cover resulting in a major fuel leak. Tapping on the cover with a plastic hammer (or the handle of a heavy screw driver) will break the cover loose without warping it. Remove the gasket and place it in your discard pile.
Use the 3/16" flat blade screw driver to remove the float retainer screws from the cover (red arrows point to screws).
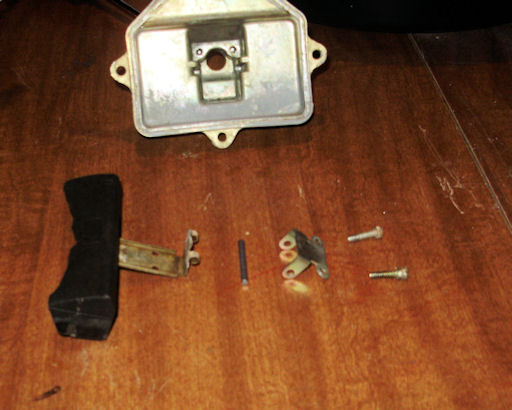
Gently remove the screws, float, and retainer bracket from the cover.
Note: You may need to shake the cover over your parts
container to remove them from the cover.
Warning! New
floats are not readily available. Be very, very careful with yours.
Here are the parts you just removed from the cover:
Last Updated 03/07/10 03:17:48 PM