Matt's Old Cars.com
Fiddling with Rambler's since 1995
Project Charity: AMX
Technical Information
Photo Gallery
Rambler American Restoration
1978 El Camino
1967 Rambler American
2007 Dodge Ram
1984 Dodge Ramcharger
Links
FAQ
Send me an e-mail:
Contact Form
Back to American Restoration Index
Carter Dual Action Fuel Pump Rebuild
Part 2 -
Disassembly (continued)
September 19, 2010
Yesterday, I cleaned the pump up and since the rebuild kit arrived and I could see exactly what it has in it, I did a little more disassembly.
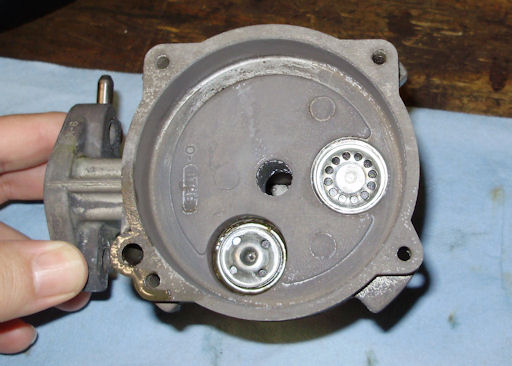
The first task was to remove the check valves under the vacuum pump piston.

It is very important to get these in the right orientation so make sure that you note exactly how they are installed. These check valves are not very easy to remove since there is no access from below. To remove the one on the right, I drove a screw driver through it and pried it out in pieces. To remove the one on the left, I ran a punch through the middle which caused it to collapse in enough to pry out.
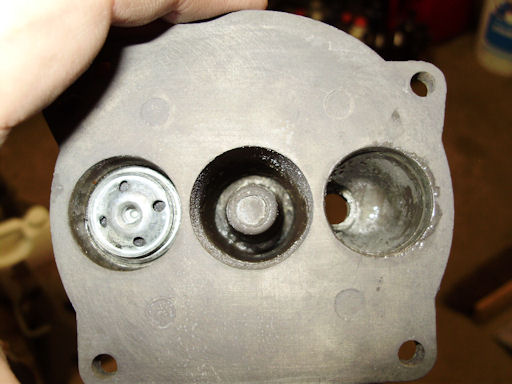
The next job was to remove the check valves from the vacuum section cover.

I've already removed the valve from under the fitting that goes to the engine. To remove these valves, I drove them out with a punch from the other side of the cover.
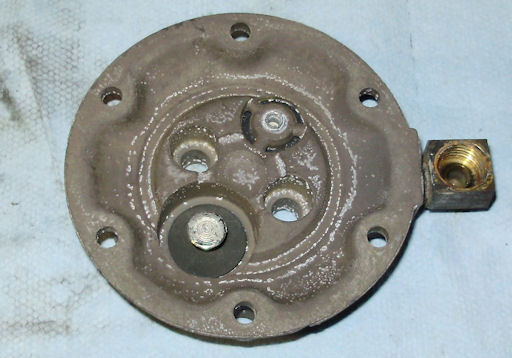
The next items to remove are the check valves from the pulsator section.

This fuel pump has been previously rebuilt. The factory style check valves are different than shown. In this case, the valve is made up of a rubber washer, spring, and a rivet. To remove these, all I had to do was carefully drill out the peened over end of the rivet and then drive the rivet out with a punch.
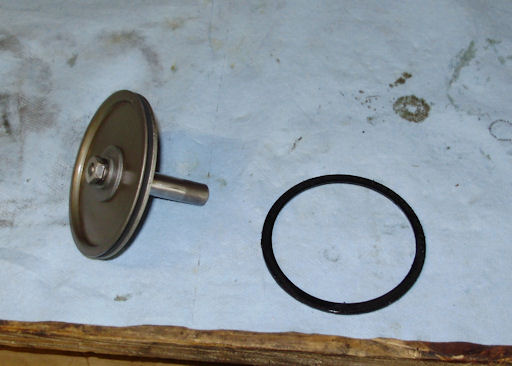
The last things I did were remove the elbow fitting from the pulsator section and the seal from the vacuum piston.

Note: The piston seal is hard to remove with the piston assembled. I took mine apart to remove it. If you do this, you must reassemble the piston before installing the new seal. If you try to install the seal will the piston is apart, you could pinch the seal which will cause it to fail quickly.
Once this was done, I did a little more cleaning to get the gunk behind the check valves in the vacuum section, blasted all of the parts with glass beads, and painted everything.
Up Next: Putting it together
Last Updated 09/25/10 09:41:50 PM