Matt's Old Cars.com
Fiddling with Rambler's since 1995
Project Charity: AMX
Technical Information
Photo Gallery
Rambler American Restoration
1978 El Camino
1967 Rambler American
2007 Dodge Ram
1984 Dodge Ramcharger
Links
FAQ
Send me an e-mail:
Contact Form
Driver's Side Quarter & Rocker Panels
Part 5 - Rocker Rust -- The Surgery Begins
Back to American Restoration Index
August 23, 2003
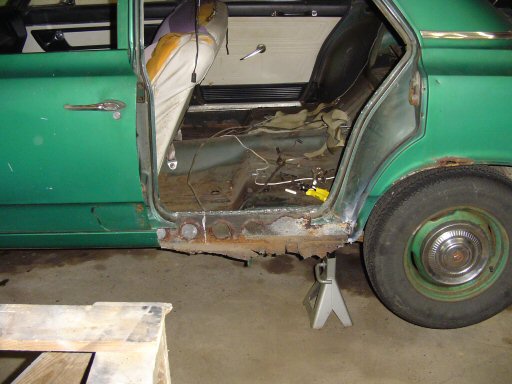
Saturday August 23rd found me starting the first session of cutting out the bad metal. The picture below shows where I stopped for the day. The white line on the outer rocker panel shows where I'll cut the outer rocker. Everything between this line and the back of the car will need to be fabricated.
Also, note that I've pulled the rear body harness into the back of the car. If you don't do this, chances are very high that you'll end up either cutting it or melting it. I didn't take any pictures of the process, but you'll need to remove the steering wheel and instrument panel to get to the connectors for the rear wiring harness. I also needed to unplug most of the stuff in the trunk so I could slide the harness forward enough to make it easier to unplug. If the dash were out of the car, this step would have taken about 10 minutes instead of the almost hour it took me today.
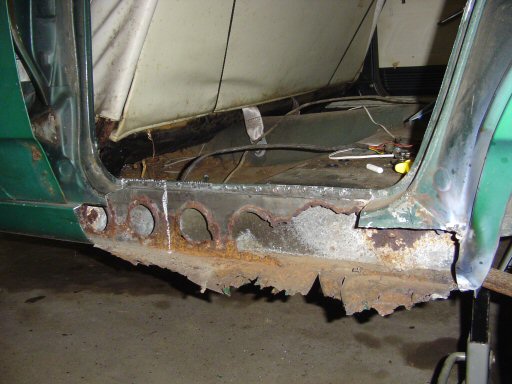
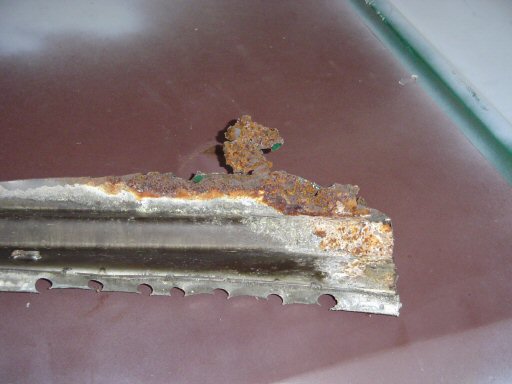
Here's a little better view of the outer rocker panel. After I took the top of the rocker cover off, I did get a little bit of a surprise that will make putting this back together a little more involved than I thought it was going to be.
The surprise was that the outer rocker is attached directly to the cover. I'm guessing that the rocker cover and outer rocker were attached to each other before they were mated to the inner rocker. It's actually not a bad way to do it, but since I don't plan on taking the entire side of the car apart to duplicate this, I'll have to find another method. My current plan is to attach the new section of outer rocker to the existing panels I'm not replacing and then measuring for a line of holes on the new cover. I'll use screws to hold everything in place temporarily and then plug weld it all together.
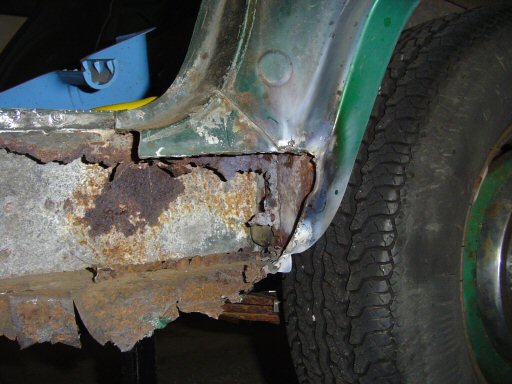
Here's a shot of a spot on the inner rocker I'm a little concerned about. It's not rusted through and it isn't soft but there was a pretty thick layer of loose rust on it. I'm thinking that I'll just treat it and then weld a reinforcement plate over it.
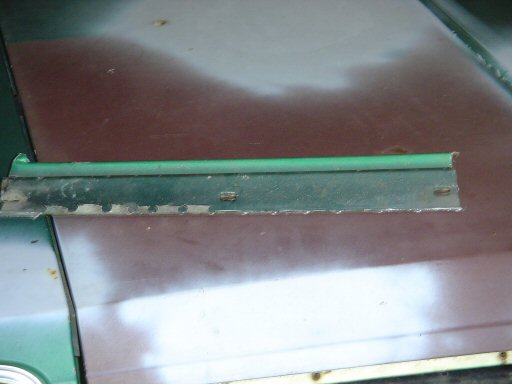
Here's the top of the rocker cover. Notice that there are three slots in it. Those are for the screws that attach the sill plate to the car. The new cover does not have these in it so I'll need to do this myself. One thing I learned when fixing the cowl last year is that you should never get rid of big chunks like this until the project's done.
Here's a "worm's eye view" of how bad the rust was in the rocker. I'm not sure what type of coating is on the original cover (the coating is the dark stuff) but I do want to find out. Except for where the mouse nest was, it seems like it was pretty effective at keeping it from rusting.
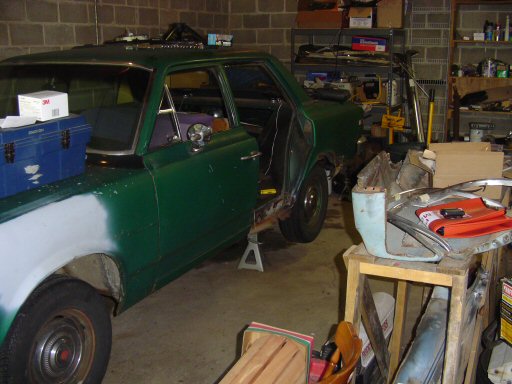
Here's what it looks like when you open the garage door at my house. As you can see, I don't really have all that much room to work (the garage is an oversize two car) and it would be very nice to get the car about another foot or so in the air but I have been able to get a lot of stuff done given the limits of what I can put in my garage. I may end up building a wooden frame to set on my jack stands to get the car up higher.
Up next: Part 6 - Rocker Rust --Finishing Up The Surgery
Last Updated 02/15/04 05:02:34 PM